| title: "@@Brand@@ @@Model@@ @@Version|@@" |
|---|
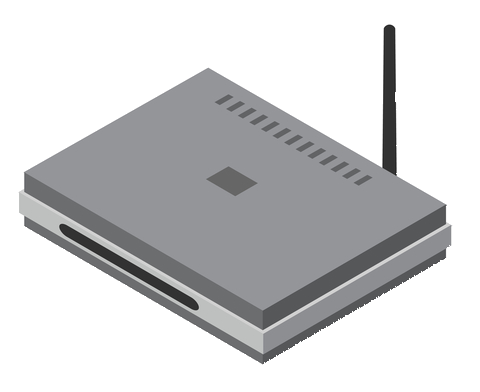
| # @@Brand@@ @@Model@@ @@Version|@@ |
/* This template is intended to be used via https://openwrt.org/meta/create_new_device_page . */
Write a short, relevant description of the device. Include a technical overview, but avoid marketing buzzwords/useless stuff. Two to four sentences is about right. A picture is good, too. Edit the page to see how to add pictures.
/***/ /* How to add images ========> https://openwrt.org/meta/adding_images_to_openwrt_wiki */ /***/
¶ OpenWrt support
<color red>Not supported.</color>
/*** if info available: uncomment and fill in
¶ Supporting activities
Describe if there are any ongoing activities that might lead to OpenWrt support.
- OpenWrt forum thread: (add link)
***/
/*** if info available: uncomment and fill in
¶ Experimental firmware
List experimental firmware download links here.
None at this time.
- External image (add link)
- trunk image (add link)
- ...
***/
¶ Hardware highlights
| CPU | Ram | Flash | Network | WLAN | USB | Serial | JTag |
|---|---|---|---|---|---|---|---|
| EXAMPLE RT3052 @ 384 MHz | 64 MiB | 8 MiB | 4x 10/100 | bgn | 1x 2.0 | Yes | ? |
/*** if info available: uncomment and fill in
¶ Installation
¶ Installing OpenWrt
***/
/*** if info available: uncomment and fill in ===== Debricking ===== -> generic.debrick ***/
/*** if info available: uncomment and fill in ===== Failsafe mode ===== -> failsafe_and_factory_reset ***/
/*** if info available: uncomment and fill in ===== Basic configuration ===== After flashing, proceed with Basic configuration: Set up your Internet connection, configure wireless, configure USB port, etc. ***/
/*** if info available: uncomment and fill in
¶ Specific configuration
FIXME Please fill in real values for this device, then remove the EXAMPLEs and the WRAP that encloses this text.
¶ Network interfaces
The default network configuration is:
Interface Name Description Default configuration br-lan EXAMPLE LAN & WiFi EXAMPLE 192.168.1.1/24 vlan0 (eth0.0) EXAMPLE LAN ports (1 to 4) EXAMPLE None vlan1 (eth0.1) EXAMPLE WAN port EXAMPLE DHCP wl0 EXAMPLE WiFi EXAMPLE Disabled
***/
/*** if info available: uncomment and fill in
¶ Buttons
-> hardware.button on howto use and configure the hardware button(s). Here, we merely name the buttons, so we can use them in the above Howto.
FIXME Please fill in real values for this device, then remove the EXAMPLEs and the WRAP that encloses this text.
The @@Brand@@ @@Model@@ has the following buttons:
BUTTON Event EXAMPLE Reset reset EXAMPLE Secure Easy Setup ses EXAMPLE No buttons at all. -
***/
¶ Hardware
¶ Info
| Architecture | EXAMPLE MIPS |
|---|---|
| Vendor | EXAMPLE Ralink |
| Bootloader | EXAMPLE U-Boot |
| System-On-Chip | EXAMPLE Ralink RT3052 - MIPS 24K V4.12 |
| CPU/Speed | EXAMPLE 451 MHz |
| Flash-Chip | EXAMPLE unkown |
| Flash size | EXAMPLE 8 MiB |
| RAM | EXAMPLE 64 MiB |
| Wireless | EXAMPLE RT2860v2 2.4GHz 802.11bgn |
| Ethernet | EXAMPLE 10/100 Mbit/s w/ vlan support |
| Switch | EXAMPLE Qualcomm Atheros QCA8337 |
| USB | EXAMPLE 1x 2.0 |
| Serial | EXAMPLE Yes |
| JTAG | EXAMPLE Not populated |
/*** if info available: uncomment and fill in
¶ Flash Layout
FIXME Find out flash layout, then add the flash layout table here (copy, paste, modify the example).
Please check out the article Flash layout. It contains examples and explanations that describe how to document the flash layout. ***/
¶ Photos
/* =====>>>>> Standard size for photos: add ?400 to the medialink */ /* When uploading photos, name them intelligently. Nobody knows what 20100930_000602.jpg is! */ /* e.g.  */ /* Thanks, your wiki administration - Oct. 2015 */
Insert photo of front of the casing
Insert photo of back of the casing
Insert photo of backside label
Insert photo of PCB
¶ Opening the case
FIXME Describe what needs to be done to open the device, e.g. remove rubber feet, adhesive labels, screws, ...
¶ Serial
-> port.serial general information about the serial port, serial port cable, etc.
How to connect to the Serial Port of this specific device:
Insert photo of PCB with markings for serial port
FIXME Replace EXAMPLE by real values.
| Serial connection parameters for @@Brand@@ @@Model@@ @@Version@@ |
EXAMPLE 115200, 8N1, 3.3V |
|---|
¶ JTAG
-> port.jtag general information about the JTAG port, JTAG cable, etc.
How to connect to the JTAG Port of this specific device:
Insert photo of PCB with markings for JTAG port
¶ Bootlogs
¶ OEM bootlog
COPY HERE THE BOOTLOG WITH THE ORIGINAL FIRMWARE
¶ OpenWrt bootlog
COPY HERE THE BOOTLOG ONCE OPENWRT IS INSTALLED AND RUNNING
¶ Notes
¶ Tags
How to add tags 